Categories
Window Films & Tints

How to Estimate the Cost of Window Film Installation

When considering ways to enhance the beauty and functionality of your home, window film installation is an excellent choice. It offers numerous benefits, from energy efficiency to increased privacy and security. However, understanding the cost involved in window film installation can be a bit daunting. In this guide, we’ll break down the factors that affect the cost and help you estimate what you might expect to pay for this valuable home improvement.

Before diving into costs, let’s quickly discuss why window film is a popular choice among homeowners and interior designers. Window films can:

  • Reduce Energy Costs: By blocking out heat in the summer and retaining heat in the winter, window films can significantly lower your energy bills.
  • Enhance Privacy: Certain films offer increased privacy, preventing outsiders from peering into your home.
  • Protect Against UV Rays: Window films can block up to 99% of harmful UV rays, which protects your furniture and floors from fading.
  • Improve Security: Security films add a layer of protection, making it more difficult for intruders to break in through your windows.

Factors Influencing Window Film Installation Cost

Several factors can influence the cost of installing window film. Understanding these will help you make an informed decision.

Type of Window Film

The type of film you choose greatly affects the cost. Here are some common types:

  • Solar Control Films: These are designed to control the amount of heat and light that enters your home. They are typically mid-range in price.
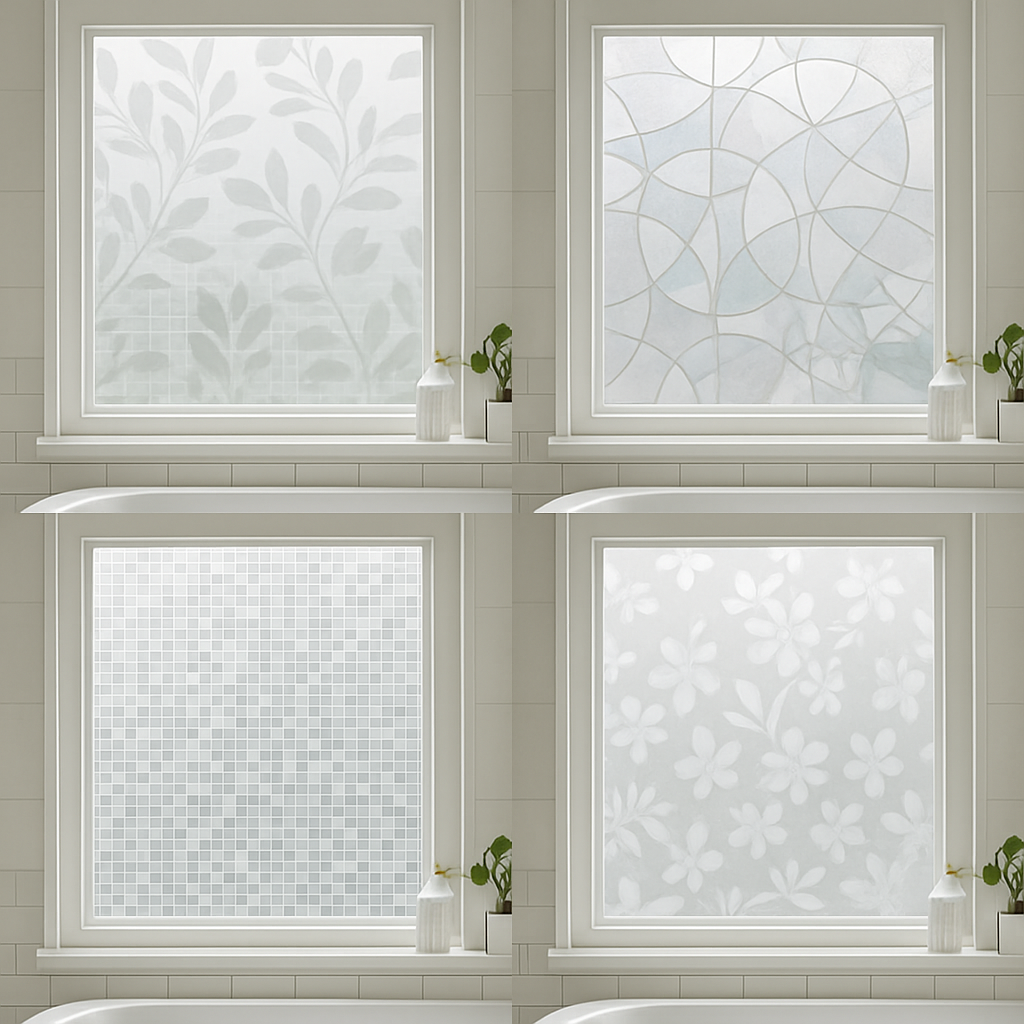
  • Decorative Films: Used for aesthetic purposes, these films are available in various patterns and colors and can vary in price depending on the complexity of the design.
  • Security Films: These are thicker and more durable, designed to hold glass together in case of breakage. They are usually more expensive due to their added protective features.
  • Privacy Films: These films are designed to obstruct view from outside, providing privacy while allowing light to enter. Their cost can vary based on opacity and design.

Size and Number of Windows

The size and number of windows you plan to cover will directly impact the cost. Larger windows or a greater number of windows will increase both material and labor costs.

Window Shape and Accessibility

Window shape and accessibility affecting installation

Unique window shapes, such as arches or circles, may require custom cutting and installation, which can add to the overall cost. Additionally, windows that are difficult to reach (e.g., those on higher floors or behind landscaping) may incur higher labor costs.

Quality of Film

Higher-quality films generally cost more but offer better durability and performance. Investing in a premium film can be more cost-effective in the long run due to its longer lifespan and superior features.

Professional Installation vs. DIY

While some homeowners may opt for a DIY approach to save money, professional installation ensures a perfect fit and finish. Professional installers have the tools and experience needed to avoid bubbles, wrinkles, and other common issues. The cost of professional installation can vary, but it is often worth the investment for the quality of the outcome.

Estimating the Cost

Basic Cost Breakdown

On average, window film installation costs can range from $5 to $15 per square foot. This estimate typically includes both materials and labor for professional installation. Here’s a simple breakdown:

  • Basic Solar Control Film: $5 to $8 per square foot
  • Decorative or Privacy Film: $6 to $12 per square foot
  • Security Film: $7 to $15 per square foot

Additional Considerations

  • Removal of Existing Film: If your windows currently have film that needs removal, this could add an additional $1 to $2 per square foot.
  • Warranty: Some installations come with warranties that can affect the price. Be sure to inquire about the warranty terms when getting a quote.

Example Calculation

Let’s say you have a living room with three large windows, each measuring 4 feet by 6 feet. You decide on a solar control film, and the installation quote is $8 per square foot.

  1. Calculate the Area: 4 ft x 6 ft = 24 sq ft per window; 24 sq ft x 3 windows = 72 sq ft total.
  2. Estimate the Cost: 72 sq ft x $8/sq ft = $576.

This is a rough estimate and actual costs can vary based on the factors discussed.

Tips for Reducing Costs

Cost-saving tips for window film installation

by Kevin Grieve (https://unsplash.com/@grievek1610begur)

  • Compare Quotes: Get multiple quotes from different installers to ensure you’re getting a competitive price.
  • Consider Bulk Discounts: Some companies offer discounts for larger projects or multiple windows.
  • Look for Promotions: Installers may have seasonal promotions or discounts for new customers.
  • Choose the Right Film: Balance your budget with the film’s functionality and benefits. Sometimes spending a bit more initially can save money in the long run.

Conclusion

Understanding the cost of window film installation involves considering various factors such as the type of film, the size of your windows, and whether you choose professional installation. With the right approach, window films can be a cost-effective solution to enhance your home’s energy efficiency, privacy, and aesthetics. By taking the time to compare options and understand the costs involved, you can make an informed decision that fits your needs and budget.

Categories
Window Films & Tints

A Beginner s Guide to Applying Window Film at Home

# A Beginner’s Guide to Applying Window Film at Home

Are you looking to enhance your home’s aesthetics or improve energy efficiency? Window film offers a variety of benefits that might just be the solution you need. In this guide, we’ll walk you through everything you need to know about applying window film at home, offering a practical approach that even beginners can follow.

Window film is a thin laminate film that can be installed on the interior or exterior of glass surfaces in homes, offices, or vehicles. It provides a variety of benefits, including heat reduction, UV blocking, glare reduction, and enhanced privacy. According to the U.S. Department of Energy, window films can significantly improve energy efficiency by reducing heat gain. The Environmental Protection Agency (EPA) also highlights the importance of managing indoor environmental conditions for comfort and health. For additional third-party guidance on how window films are evaluated and used on residential windows, you can also review the NFRC consumer guidance on window film and Natural Resources Canada’s information on upgrading windows and exterior doors for efficiency.

Benefits of Window Film

  1. Energy Efficiency: Window film can significantly reduce heating and cooling costs by minimizing heat transfer through windows.
  2. UV Protection: It blocks up to 99% of harmful UV rays, protecting your furnishings and flooring from fading.
  3. Privacy and Security: Window film enhances privacy and can add a layer of security by holding shattered glass in place.
  4. Aesthetic Appeal: Available in various designs and finishes, window film can add a decorative touch to your windows.

Preparing for Installation

Before you start applying window film, it’s essential to gather all the necessary tools and materials.

Tools and Materials Needed

  • Window film of your choice: Ensure it’s suitable for your specific application needs, whether it’s for privacy, UV protection, or decorative purposes.
  • Gila window film application solution: This solution helps in smooth application and prevents bubbles.
  • Squeegee: Used to smooth out the film and remove air bubbles.
  • Utility knife: For trimming the film to fit your window.
  • Tape measure: To measure window dimensions accurately.
  • Lint-free cloth: To clean the windows before application.
  • Spray bottle: Filled with the application solution.

Preparing Your Windows

  1. Clean the Windows: Use a lint-free cloth and a glass cleaner to ensure the windows are spotless. Any dust or dirt can create bubbles under the film.
  2. Measure and Cut the Film: Measure the window and cut the film slightly larger than the window dimensions. This allows for trimming after application.

Applying Window Film

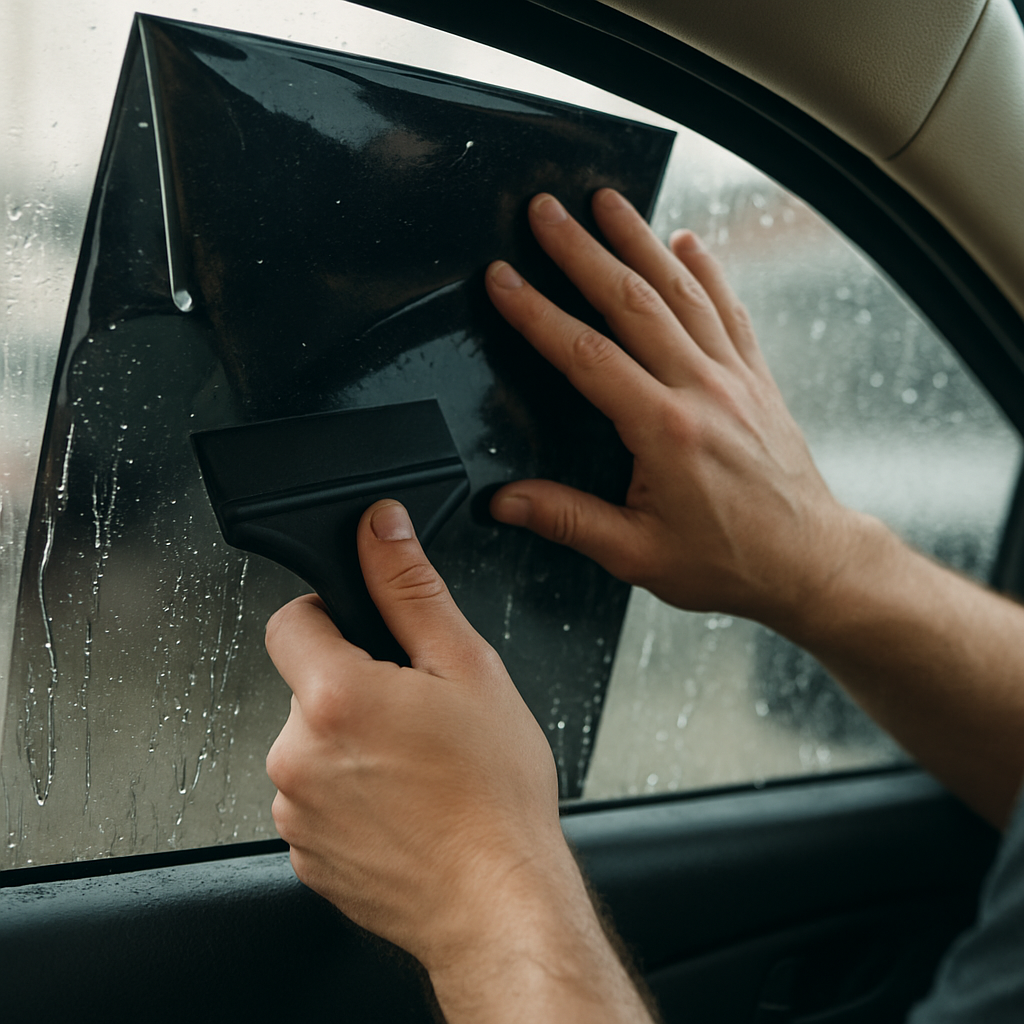
Applying window film

Now that you’re prepared, it’s time to apply the window film. Follow these steps for a smooth and professional finish.

Step-by-Step Application Guide

  1. Spray the Window: Use the spray bottle to apply the Gila window film application solution generously on the window. This helps the film slide into position.
  2. Peel the Film: Carefully peel the backing from the window film. This is easier with two people—one to hold and one to peel.
  3. Position the Film: Place the adhesive side of the film onto the wet window. Start at the top and let the film naturally adhere to the wet glass.
  4. Smooth the Film: Use the squeegee to gently smooth the film from the center outwards, pushing out any air bubbles or excess solution.
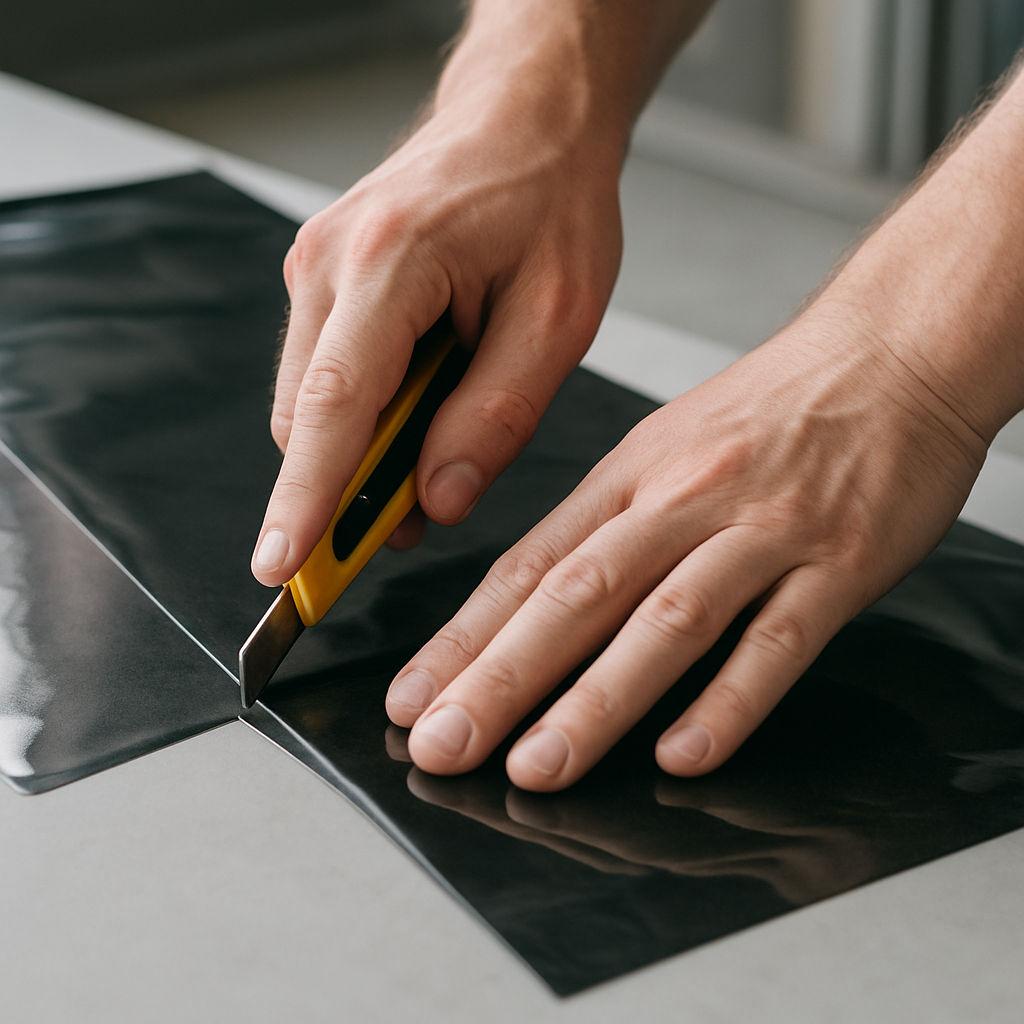
  5. Trim the Edges: Use the utility knife to trim the film to the exact size of the window. Be careful to make precise cuts for a neat finish.
  6. Final Touches: Re-squeegee the film to ensure all bubbles are removed and the film is firmly in place.

Common Mistakes to Avoid

  • Rushing the Process: Take your time to ensure each step is done correctly.
  • Not Using Enough Solution: The application solution is key to a bubble-free finish.
  • Inaccurate Cutting: Always measure twice and cut once to avoid wastage and ensure a perfect fit.

Maintaining Your Window Film

Proper maintenance can extend the life of your window film and keep it looking great.

Tips for Maintenance

  • Cleaning: Wait at least 30 days before cleaning your new film to ensure it has adhered properly. Use a soft cloth and mild soapy water.
  • Avoid Abrasives: Never use abrasive cleaners or tools that could scratch the film.
  • Regular Checks: Periodically check the film for any signs of peeling or bubbling and address these promptly.

Conclusion

Applying window film is a cost-effective and straightforward way to improve your home’s energy efficiency, privacy, and aesthetic appeal. With the right tools and a bit of patience, you can achieve professional-looking results.

By following this guide, even beginners can successfully apply window film at home. Whether you’re an interior designer seeking to enhance your client’s living spaces or a homeowner looking to add a personal touch, window film offers a versatile and practical solution.

Beautifully finished window with film

by Emily Fletke (https://unsplash.com/@emilyfletke)

With the knowledge and skills gained from this guide, you’re now ready to tackle your window film project with confidence and precision. Happy filming!

Categories
Window Films & Tints

Nighttime Privacy Solutions with Window Tinting

# Nighttime Privacy Solutions with Window Tinting

When the sun sets and night falls, the need for privacy becomes paramount. For homeowners, maintaining a sense of privacy while preserving the aesthetic appeal of their living spaces can be a delicate balance. One innovative solution to achieve this balance is nighttime window tinting. This home improvement technique not only provides privacy with window films but also enhances the comfort and style of your home.

Nighttime window tinting involves applying a specialized film to your windows. This film is designed to obstruct the view from outside while still allowing you to see out. It’s an excellent solution for those who want to maintain their privacy without closing themselves off from the world.

The Science Behind Window Tinting

Window tinting films are crafted using advanced materials that manipulate light. They are designed to reflect or absorb light in such a way that they obscure visibility from the outside. During the day, the film uses the natural brightness outside to create a mirror effect, making it difficult for outsiders to see in.

At night, when the interior lights are on, the technology in nighttime window tinting films continues to protect your privacy. While traditional films might fail as soon as the lights are on inside, nighttime privacy tints are engineered to reduce visibility from the outside even when it’s dark outside and light inside. To better understand how different types of window film function in varying lighting conditions, it helps to compare their reflective and absorptive properties.

Benefits of Nighttime Window Tinting

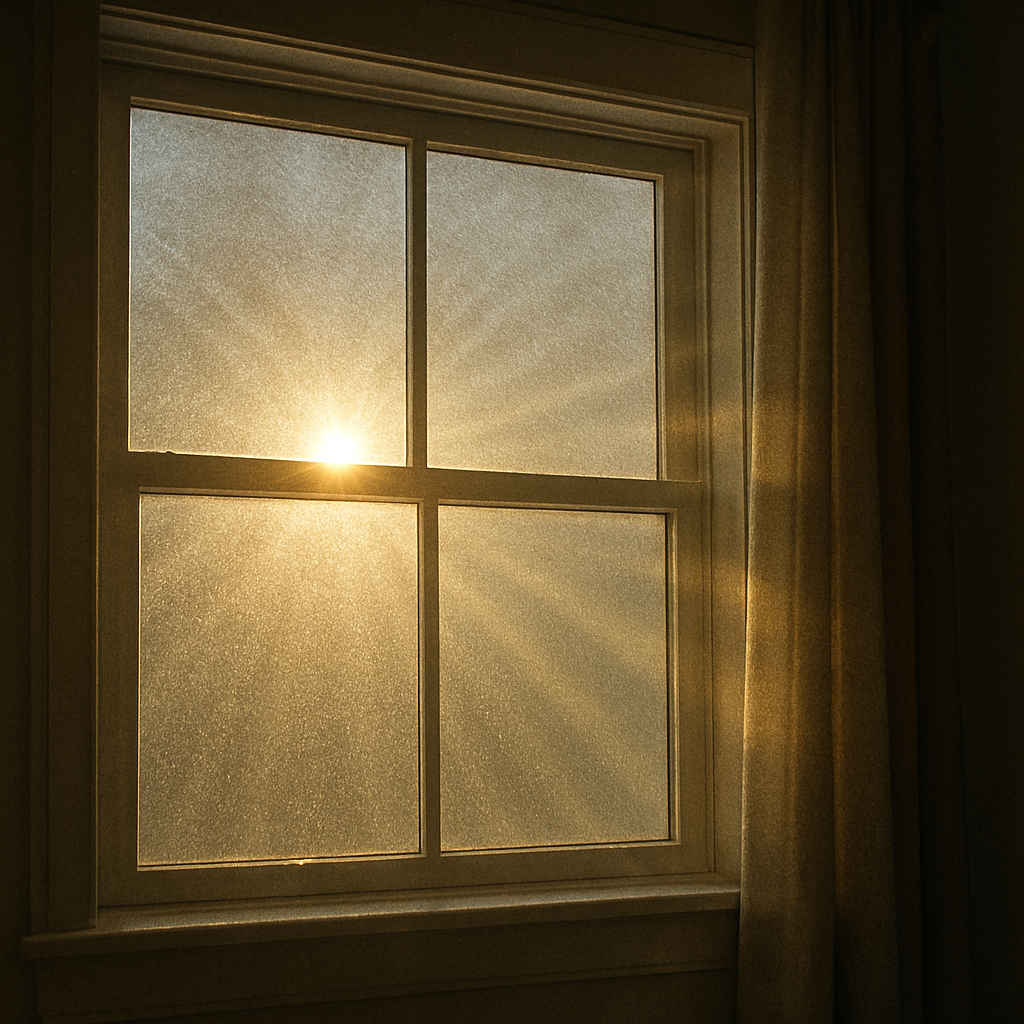
Cozy living room with window privacy tint

Enhanced Privacy

The primary benefit of nighttime window tinting is privacy. With this solution, you can enjoy your evenings without worrying about prying eyes. Whether you’re spending time with your family, watching TV, or hosting a dinner party, you can do so with peace of mind.

Aesthetic Appeal

Window privacy tinting offers a sleek and modern look to your home. It complements any interior design style, making it a versatile choice for homeowners and interior designers alike. The film can be customized in various shades and designs to match your décor, adding an element of style to your windows.

Energy Efficiency

Apart from privacy and aesthetics, window tinting also contributes to energy efficiency. The films are designed to reduce heat transfer, keeping your home cooler in the summer and warmer in the winter. This can lead to significant savings on your energy bills, making it an eco-friendly choice. According to the U.S. Department of Energy, window coverings and films can significantly reduce heat gain and improve overall home efficiency.

UV Protection

Window films also offer protection against harmful UV rays. By blocking out a significant portion of UV radiation, they protect your furniture, flooring, and artwork from fading. This is particularly beneficial for preserving the longevity and appearance of your interior décor. The Environmental Protection Agency (EPA) emphasizes the importance of limiting UV exposure to protect both health and interior materials.

Choosing the Right Window Privacy Tint

When selecting a window privacy tint, consider the following factors:

Level of Privacy

Different films offer varying levels of privacy. Some are designed to be more reflective, while others are more subtle. Assess your privacy needs and choose a film that meets them.

Light Transmission

Consider how much natural light you want to let into your home. Some films are darker and allow less light, while others are lighter. Balance your need for privacy with your desire for natural light.

Aesthetic Preferences

Select a film that complements your home’s interior design. With a range of colors, patterns, and finishes available, you can find a tint that enhances your living space.

Professional Installation

For the best results, consider professional installation. Experts in window film installations ensure precise application and optimal performance of the films. They can provide valuable advice on choosing the right product for your specific needs.

How to Maintain Your Window Tint

Cleaning window with privacy tint

by Don Bach (https://unsplash.com/@liberatetheimage)

Maintaining your window tint is simple. Here are a few tips to ensure its longevity:

Categories
Derma Roller

Best Kept Secrets About Blackout Window Film

# Best Kept Secrets About Blackout Window Film

When it comes to enhancing the comfort and style of your home, blackout window film is a game-changer. This innovative solution offers a variety of benefits, from improving privacy to reducing energy costs. If you’re an interior designer looking for cost-effective and stylish solutions, or a homeowner aiming to upgrade your living space, understanding the benefits of window films is essential.

Blackout window film is a type of window tinting that completely blocks out light from entering through the window. Unlike traditional window treatments, such as curtains or blinds, blackout film is applied directly to the glass, providing a sleek and modern look while offering the same level of privacy and light control.

Advantages of Blackout Window Film

  1. Enhanced Privacy: One of the primary benefits of blackout window film is the privacy it offers. Whether you’re in a busy urban area or simply value your personal space, blackout film ensures that no prying eyes can see inside your home.
  2. Light Control: The film completely blocks out sunlight, which is ideal for bedrooms, home theaters, or any space where you want to control the amount of light that enters.
  3. Energy Efficiency: By blocking out the sun’s rays, blackout window film helps maintain a consistent indoor temperature. This reduces the need for air conditioning in the summer and heating in the winter, leading to lower energy bills. According to the U.S. Department of Energy, managing solar heat gain is a key factor in improving home energy efficiency.
  4. Protection from UV Rays: Blackout film also protects your interior furnishings from harmful UV rays that can cause fading and damage over time. The Environmental Protection Agency (EPA) notes that prolonged UV exposure can damage materials and indoor surfaces.
  5. Aesthetic Appeal: With a sleek, uniform appearance, blackout window film complements a variety of interior design styles, offering a modern and polished look.

How Does Blackout Window Film Work?

Window film application process

The application of blackout window film is a straightforward process. It involves applying a layer of film to the inside surface of the window. This film is made of multiple layers, including a scratch-resistant coating and a UV-blocking layer, which work together to provide the desired level of light control and protection.

Installation Process

  1. Preparation: The window surface must be thoroughly cleaned to ensure proper adhesion of the film.
  2. Cutting and Sizing: The film is
Categories
Derma Roller

Why Eye Creams Are A Necessity For Students This Fall

If you’re a student, you might be preoccupied with acne treatments and ways to lessen scars that you might forget about another important aspect of skin care- eye creams. Using an eye hydration cream is a simple treatment that can make a huge difference in your daily skincare routine, and we have the top three reasons why eye cream is a necessity for you this fall!

1.     Improve your appearance- even in the morning!

We know that students can get run down from late nights studying and keeping odd hours. So if you’re prone to waking up in the morning and feeling rundown, adding an eye cream to your daily skin care routine can help to keep you looking fresh in the mornings. Just having a simple and quick routine of doing a quick facial cleanse and then applying hydration cream can have a huge impact on those dark circles we all hate. Eye cream helps reduce puffiness and keep the skin young, fresh, and healthy.

2.     Do Something Good For Your Skin

When you’re a student, it’s hard to remember to drink enough water, sleep eight hours a night, and eat healthy. A hydrating eye cream takes less than 30 seconds to apply, and using it twice a day is a wonderful treatment for your skin to help it stay healthy. Not only will your skin be more hydrated, it is a soothing treatment and is a great way to relax during the day.

3.     Start Taking Care of Your Skin Now

If you’ve been frustrated by crow’s feet and dry, cracked skin, a hydrating eye cream can help to make your skin healthier and more nourished. And since smooth, hydrated skin doesn’t wrinkle as quickly as dry skin, a hydrating eye cream can act as a preventative measure against aging. Starting it while you’re still young will lead to great results later on.

Grab the Right Eye Cream Now

If these three reasons have convinced you it’s time to pick up some eye cream along with your other back-to-school essentials, check out our website! We’ve got all the products to help you get rid of puffy eyes and dark circles to help you start living your best life.

Categories
Derma Roller

Which Serum Or Oil Product To Use Based On Your Skin Type

If you want to have beautiful and healthy skin, the first step is to understand what type of skin you have! If you’re not aware of what your skin type is, you could end up treating your skin with the wrong treatments: for example, people with dry skin shouldn’t use harsh cleansers as these can cause even further breakouts!

If you know your skin type, you might still have some questions- what is the best treatment for combination skin? Can argan oil help oily skin? Discovering the oil product that will work with your skin type isn’t as hard as you might think, and knowing it will make your skin care routine even easier.

Oily Skin

People with oily skin naturally produce greater amounts of sebum, which gives their skin a more ‘greasy’ feel to it. Often, people with an oily skin type often only use a cleanser, and don’t use other products in their daily routines. If you have oily skin, a better option is to look for a serum with vitamin C or argan oil. These ingredients will help balance out your skin type, and give you a more even tone. Just make sure that these serums don’t also contain Vitamin E- the combination will be less effective for your skin!  

Dry Skin

People with dry skin might be averse to using many products, since the skin is so delicate. However, people with dry skin should use a gentle cleanser once a day to help prepare the skin for a hydrating oil or moisturizer. Though Vitamin C is normally recommended especially for oily skin, this nutrient works great for any skin type. If your skin type is dry skin, choose a Vitamin C serum with Vitamin E to enhance the effectiveness of the serum. This added ingredient will help make the Vitamin C treatment last even longer!

Combination Skin

With all this talk about oily and dry skin, you might feel left out if you have combination skin! If you have trouble specifically with pimples, a great option is a squalane oil acne-fighting product. These products can help to treat pimples and other skin problems. If you find that you don’t have issues with pimples, you should follow the guidelines for oily skin- leave out Vitamin E-based oils!

Oils for Every Skin Type

Whatever your skin type, we have resources for you to help figure out what set of skincare oils will help you look and feel your best. If you need any assistance in finding the best product for you, visit our website for more information. Not only will you find products that will work for your skin (whether oily, dry or combination) but we have helpful blogs which can show you exactly what treatment you need!