Enhancing your home’s comfort and aesthetics with window tinting is a wise decision. Not only does it provide privacy and reduce glare, but it also boosts energy efficiency, lowering your utility bills. This practical addition to your home serves multiple purposes, making it a valuable investment. As someone familiar with home improvement solutions, I understand the importance of precision and quality when it comes to window film installations. In this guide, I’ll share essential tips for a successful home window tinting project, ensuring that you gain the most from your investment.
Window tinting is not just about aesthetics; it also contributes significantly to the functionality of your home. When installed correctly, window films can enhance the overall ambiance of your living space, making it more enjoyable and comfortable year-round. Additionally, with the rising costs of energy, the energy-saving benefits of window tinting cannot be overstated. By taking the time to carefully plan and execute your tinting project, you can enjoy a host of benefits that extend beyond just visual appeal.
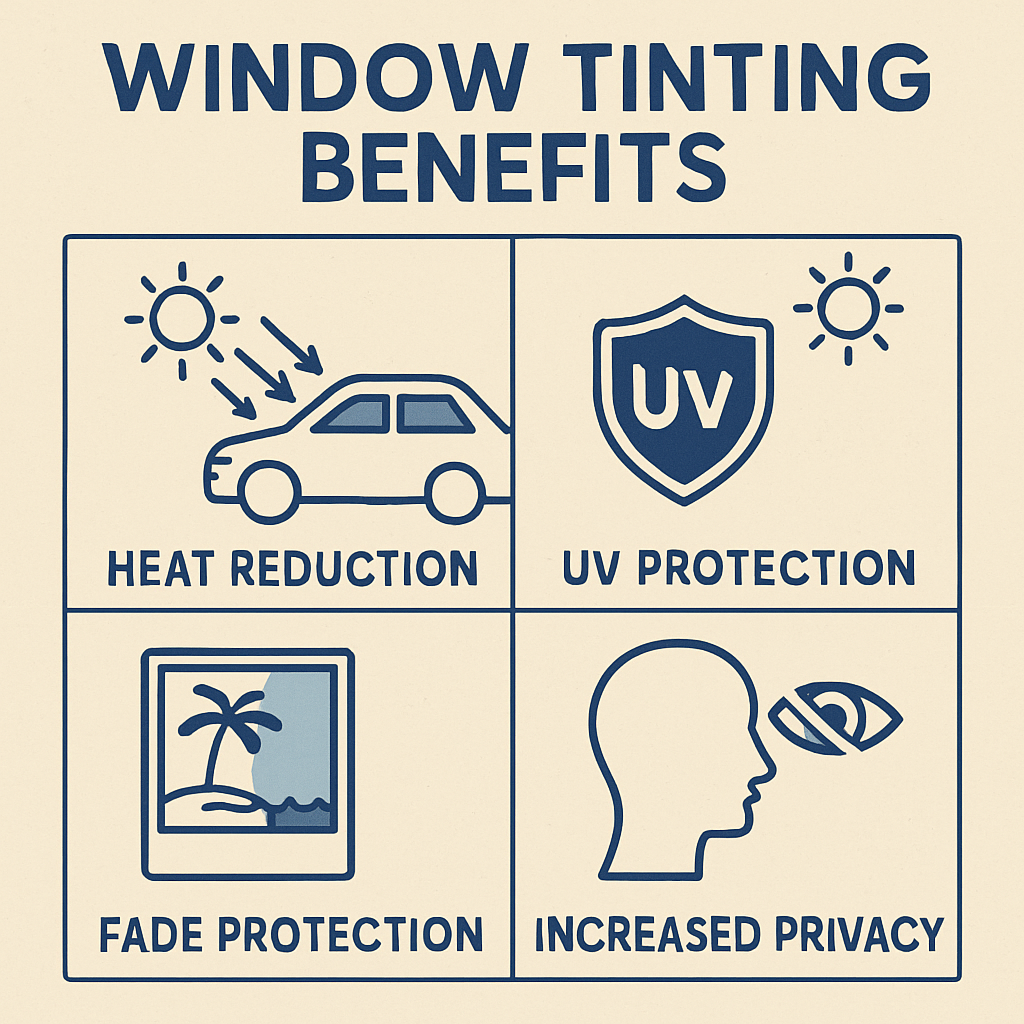
Before diving into the installation tips, it’s crucial to understand why home window tinting is beneficial. Window tinting offers a range of advantages:
- Privacy and Security: Tinted windows provide an extra layer of privacy, preventing prying eyes from seeing inside while still allowing natural light to enter. This feature is especially valuable for homes in densely populated areas or those with large windows facing public spaces. Additionally, some window films offer added security by holding glass together in case of breakage, reducing the risk of injury from shattered glass.
- Energy Efficiency: By reducing heat gain during the summer and heat loss during the winter, window films can significantly cut down on energy consumption, thereby reducing energy bills. This energy efficiency also contributes to a smaller carbon footprint, making window tinting an environmentally friendly choice. The insulating properties of window films help maintain a consistent indoor temperature, reducing the strain on heating and cooling systems and extending their lifespan.
- UV Protection: Window films can block up to 99% of harmful ultraviolet rays, protecting your furniture, flooring, and artwork from fading. This protection extends the life of your interior furnishings, preserving their appearance and value over time. UV protection is particularly important for homes with large windows or sunrooms, where prolonged sun exposure can cause significant damage. For more background on UV risks, see Health Canada’s overview of ultraviolet radiation.
- Glare Reduction: Tinted windows minimize glare on screens and reflective surfaces, creating a more comfortable indoor environment. This reduction in glare enhances the enjoyment of electronic devices and improves visibility, making it easier to work from home or enjoy leisure activities. By controlling the amount of sunlight entering a room, window films also help prevent eye strain and enhance overall comfort. If you want a broader energy comfort context (including films), the U.S. Department of Energy covers this in its guide to energy-efficient window coverings.
Essential Tools and Materials
Before you start the installation process, gather the necessary tools and materials. Having everything at hand ensures a smoother workflow. Here’s a list of what you’ll need:
- Window film: Choose a film that suits your specific needs, whether for privacy, UV protection, or aesthetics.
- Spray bottle with soapy water: This will serve as a lubricant, allowing you to position the film accurately.
- Squeegee: Essential for smoothing out the film and eliminating air bubbles.
- Utility knife: A sharp blade is crucial for trimming the film precisely.
- Measuring tape: Accurate measurements ensure you cut the film to the correct size.
- Lint-free cloth: Used for cleaning and ensuring a dust-free surface.
- Glass cleaner: Provides a spotless surface for film application.
Having these tools and materials ready not only streamlines the process but also helps prevent common mistakes that can occur during installation. Investing in quality tools, such as a good squeegee and utility knife, can make a significant difference in the final outcome, ensuring a professional-looking finish.
Preparing for Installation

Preparation is key to a successful window tinting project. Follow these steps to ensure your windows are ready for film application:
Clean the Windows Thoroughly
Dirt, dust, and grime can cause bubbles and imperfections under the film. Use a glass cleaner and a lint-free cloth to clean the windows thoroughly. Pay special attention to corners and edges, as these areas tend to accumulate more dirt. Consider cleaning the windows a day before installation to allow them to dry completely, preventing moisture-related issues during film application.
Cleaning is a critical step that shouldn’t be rushed. A spotless surface ensures the adhesive on the film bonds properly with the glass, enhancing durability and appearance. If residue or particles are left on the window, they can create unsightly bubbles or cause the film to peel prematurely, undermining the effectiveness of your tinting efforts.
Measure and Cut the Film
Accurate measurements are essential to avoid waste and ensure a perfect fit. Measure the dimensions of each window and cut the film slightly larger than the window size. This extra allowance will help during the trimming process. Use a flat, clean surface to lay out and cut the film, ensuring precision in every cut.
Taking the time to measure carefully can save you from costly mistakes. If you’re tinting multiple windows, label each piece of film according to its corresponding window to avoid confusion during installation. This organization can streamline the process and reduce the likelihood of errors.
Set Up a Clean Work Area
Ensure your work area is clean and free from dust. Lay the film on a flat surface, and use a clean cloth to wipe any debris from the film before application. Creating a controlled environment helps prevent contaminants from affecting the adhesive or surface of the film.
A tidy workspace contributes to a more efficient workflow and better results. Consider using a drop cloth or protective covering on your workspace to catch any debris or excess water, keeping the area tidy and minimizing cleanup time after the installation is complete.
Step-by-Step Installation Guide
Now that your windows are clean and your film is ready, it’s time to start the installation process.
Step 1: Wet the Window
Fill a spray bottle with a solution of soapy water. Spray the window generously to keep the surface wet. This will allow you to slide the film into position easily. The soapy solution acts as a lubricant, providing the flexibility needed to make adjustments.
Ensuring the window is adequately wet is crucial for a smooth application. The slippery surface allows you to reposition the film as needed without damaging it, giving you the opportunity to achieve a perfect fit and alignment.
Step 2: Apply the Film
Peel the backing from the film and carefully apply it to the wet window. Start from the top and work your way down, using your hands to smooth out any air bubbles as you go. This initial placement sets the stage for a successful installation, so take your time to get it right.
Applying the film can be a delicate process, so patience is key. If you’re working on a large window, consider enlisting the help of a friend to ensure the film stays aligned and doesn’t fold over onto itself. Teamwork can make the application process more manageable and efficient.
Step 3: Use a Squeegee
Using a squeegee, gently press the film from the center outwards to remove excess water and air bubbles. Be patient during this process to ensure a smooth finish. Work slowly and methodically, paying attention to any areas where bubbles may form.
The squeegee is an essential tool in achieving a professional finish. By carefully pressing out the water and air, you’re helping the film adhere securely to the glass, preventing future issues like peeling or bubbling. Take your time to ensure every section is smooth and bubble-free.
Step 4: Trim Excess Film
Once the film is in place, use a utility knife to trim the excess film around the edges. Be careful not to cut into the window frame. This step is crucial for a clean, polished appearance and helps the film fit snugly within the window frame.
Precision is important during the trimming process. Use a steady hand and take your time to follow the contours of the window frame accurately. A well-trimmed edge not only looks better but also ensures the film remains secure over time.
Step 5: Final Squeegee
After trimming, use the squeegee again to ensure all bubbles and excess water are removed. Pay attention to the edges and corners. This final pass ensures the film is fully adhered and smooth, completing the installation process.
The final squeegee step is your opportunity to perfect the installation. Check for any remaining imperfections and address them promptly. A careful final inspection can make all the difference in achieving a flawless finish that enhances both the appearance and performance of your window tinting.
Post-Installation Care

by Egor Myznik (https://unsplash.com/@vonshnauzer)
Proper care after installation is crucial for the longevity and effectiveness of your window tinting. Here are some tips to follow:
Allow Time for Curing
Window film requires time to cure fully. Avoid cleaning the windows for at least a week after installation to allow the adhesive to set properly. This curing period is vital for ensuring the film adheres securely and functions as intended.
During the curing period, it’s important to avoid touching or disturbing the film. Any manipulation before the adhesive sets can compromise its performance, leading to peeling or bubbling. Patience during this stage will pay off in terms of durability and appearance.
Use Mild Cleaning Solutions
When cleaning tinted windows, use mild, non-abrasive cleaning solutions and a soft cloth. Avoid ammonia-based cleaners, as they can damage the film. Opt for gentle products that won’t degrade the film’s surface or affect its longevity.
Regular maintenance with the right cleaning solutions will keep your tinted windows looking pristine. By preserving the integrity of the film, you ensure that it continues to provide UV protection, energy efficiency, and privacy benefits for years to come.
Inspect Regularly
Regularly inspect the film for signs of peeling or bubbling. Address any issues promptly to maintain the film’s effectiveness and appearance. Early detection of problems can prevent them from worsening and requiring more extensive repairs.
Routine inspections allow you to catch small issues before they become major problems. By staying vigilant, you can ensure that your window tinting remains in excellent condition, providing the benefits you invested in without interruption.
Choosing the Right Window Film
Not all window films are created equal, and choosing the right one is crucial for achieving your desired results. Consider the following factors:
- Type of Film: There are various types of window films, including reflective, tinted, and frosted. Each serves different purposes, so choose one that aligns with your needs. Reflective films are ideal for privacy and heat reduction, while frosted films offer decorative and privacy benefits.
- Quality: Invest in high-quality films from reputable manufacturers. While they may cost more upfront, they offer better durability and performance. High-quality films are less likely to fade, bubble, or peel, providing a longer-lasting solution.
- Warranty: Look for films that come with a warranty. This provides peace of mind and protection against defects and poor performance. A good warranty indicates the manufacturer’s confidence in their product and offers reassurance that you’re making a sound investment.
Selecting the right film involves considering both functional needs and aesthetic preferences. By understanding the differences between film types and prioritizing quality, you can make an informed decision that enhances your home and meets your specific requirements.
Conclusion
Home window tinting is an excellent way to enhance your living space’s comfort, privacy, and energy efficiency. By following these installation tips and choosing the right film, you can achieve professional-looking results that will last for years. This investment not only adds value to your home but also contributes to a more sustainable and enjoyable living environment.
As an interior designer, offering window tinting as a solution to your clients can provide them with both aesthetic and functional benefits. It complements interior designs while promoting eco-friendliness and cost-effectiveness. Embrace this innovative solution to enhance your projects and meet your clients’ needs effectively, ensuring satisfaction and success in your design endeavors.
Window tinting is more than just a home improvement; it’s a versatile solution that addresses multiple needs simultaneously. By integrating this option into your design portfolio, you can offer clients a comprehensive approach to enhancing their homes, delivering results that are both beautiful and practical.